


4.1 Landscape
TRAX takes a different approach to creating landscapes in your layout. Instead of drawing vector based shapes, it let's you spray paint your terrain type on your table and sculpt terrain elevation.
Enabling landscaping
The landscaping features only work on tables. By default, when creating a table, the landscaping features are disabled. When you want to add terrain and elevation to it, first enable it in the table tab:
1. On the scenery tab, in the Terrain group, choose a terrain type from the drop down box. This will be the type your table will initially be painted with.
2. Click the table you want to add landscaping capabilties to
You now see the table context tab, with the terrain group in off-modus: 
3. Click on the small chain button: ![]()
This will enable the landscaping for this table. The terrain group will turn to on-modus: 
To read more about the other functions in the Table tab terrain group, please check out Tables
Painting terrain types
Now you can start painting and sculpting. It's up to you in what order.
To spray paint terrain types on your table, you use the functions in the terrain group on the scenery tab: 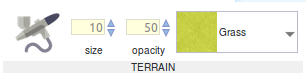
In this group you see - from left to right - the following controls:
- the button that toggles spray paint mode on and off: ![]()
- the inputs for the size and opacity
- the dropdown list to select the terrain types
To start painting, just click the button with the airbrush icon. It will turn red to show it is in active state. While in spray paint mode, you can not drag the TRAX canvas to navigate in it. The scroll wheel still lets you zoom in and out. When in spray paint modus, the mouse pointer will also change into an airbrush. Move this airbrush over the table you want to paint. Press the left button and move the mouse to start painting.
The terrain types you can use are predefined textures that will be used to color the terrain. You can select them from the dropdown box. By lowering the opacity, you can blend two or more terrain types to create smooth transitions.
Sculpting elevation
The functions for sculpting are found in the elevation group on the scenery tab: 
The terrain height is shown by shadows and highlights of the slopes: moving from bottom to top darker slopes go up and lighter slopes go down.
The controls in this group:
- the button that switches on and off the sculpting mode: ![]()
- the inputs for the size and height
- the sculpting mode
- the brush type
Now, press the button to switch on the sculpting mode. The mouse pointer will change accoordingly to show the sculpting mode you choose. Move the pointer over the table again. Press the left mouse button and move the mouse to sculpt. Depending on the current mode, the following will happen:
![]() raise mode: The landscape will be raised by the height, shown in the input control.
raise mode: The landscape will be raised by the height, shown in the input control.
![]() absolute mode: The landscape will be set to the exact height shown in the input control.
absolute mode: The landscape will be set to the exact height shown in the input control.
![]() picking mode: Hovering the pointer over the table will show the height on the current position. Click left to set the height input to this value.
picking mode: Hovering the pointer over the table will show the height on the current position. Click left to set the height input to this value.
If you want to lower the terrain, just set the height input to a negative number and use the raise tool. In absolute mode, a negative number will set the height below the table ground level.
The brush does also have an effect on how sculpting will turn out: ![]() Has a soften effect: In the center -right below your mouse pointer - the effect will be very solid,
Has a soften effect: In the center -right below your mouse pointer - the effect will be very solid,
further away from the center the effect will be less. In raising mode the terrain will be raised less, in absolute mode a height will be calculated somewhere between the set height and the current height at that point.
![]() The effect will be applied to a circle if given radius. There is no softening.
The effect will be applied to a circle if given radius. There is no softening.
![]() The effect will be applied to a square if given size. There is no softening.
The effect will be applied to a square if given size. There is no softening.
![]() The effect will be applied randomly within the area of given size. It is applied with softening.
The effect will be applied randomly within the area of given size. It is applied with softening.